Exporting Animation from Piskel
1. Exporting from Piskel
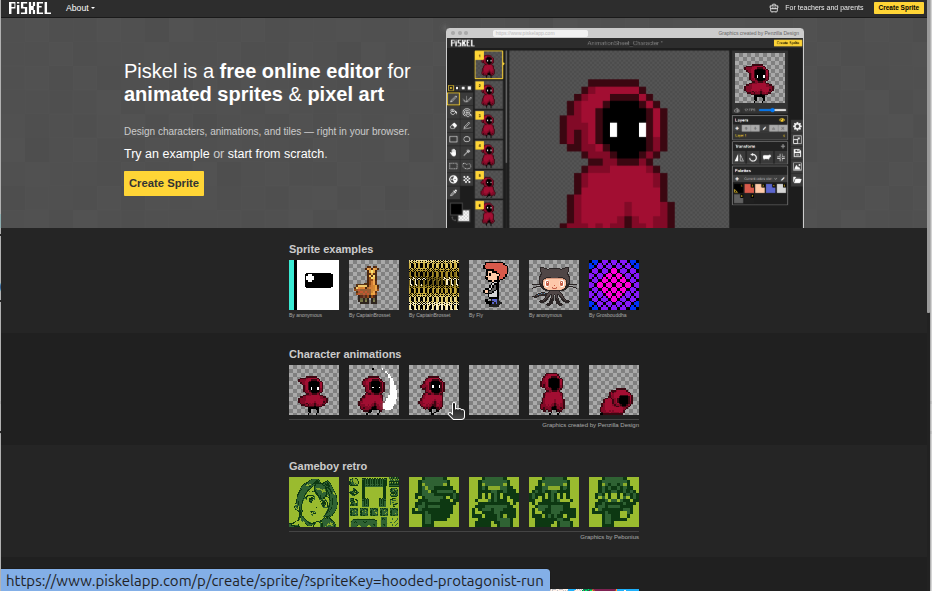
Let’s start by opening one of the example animations on the Piskel home page.
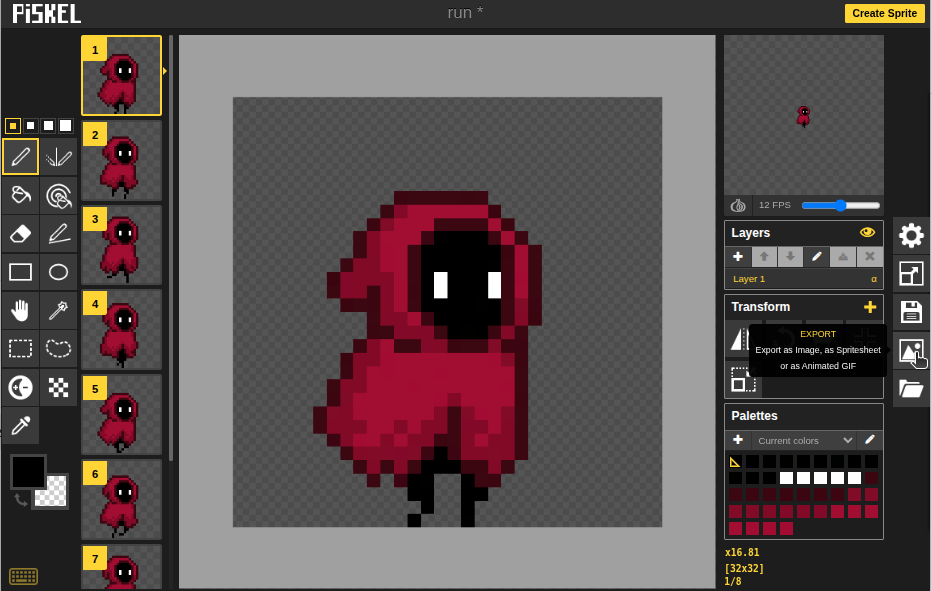
1. The export button
Select the export button. Note that we are using the export button instead of the save button.
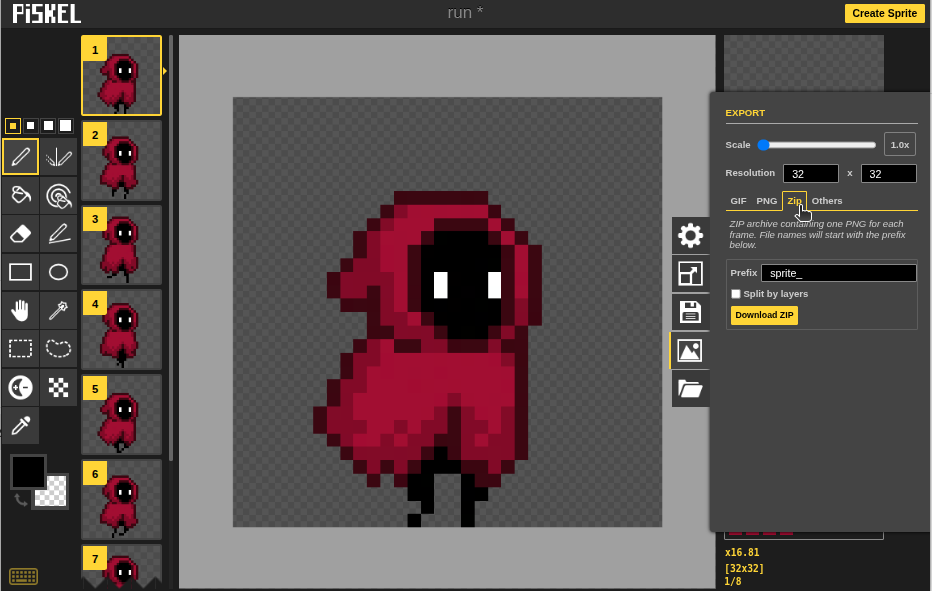
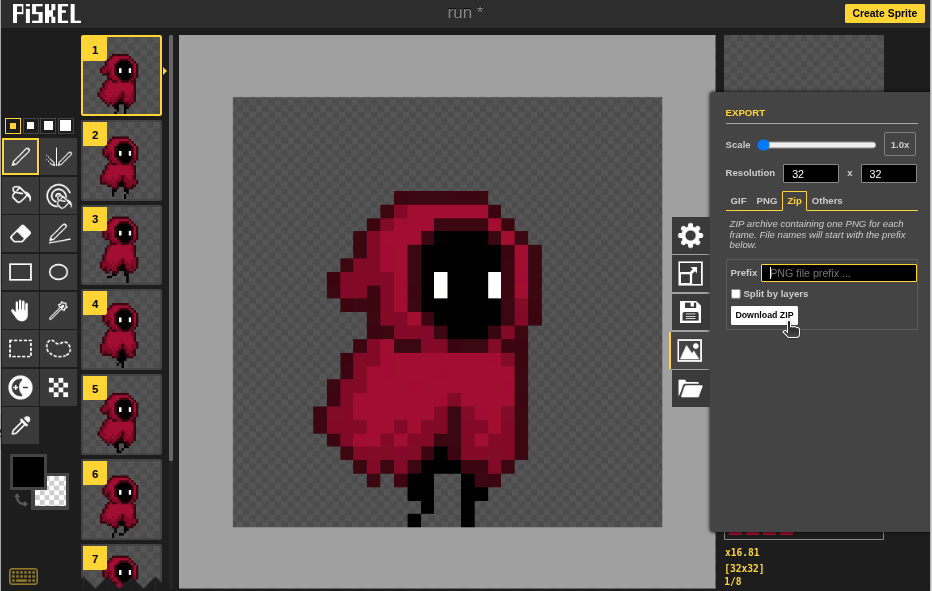
2. The ZIP tab
You will get a ZIP file with each frame of the animation as PNG files. We choose the ZIP option instead of the GIF option the GIFs exported by Piskel are often noisy.
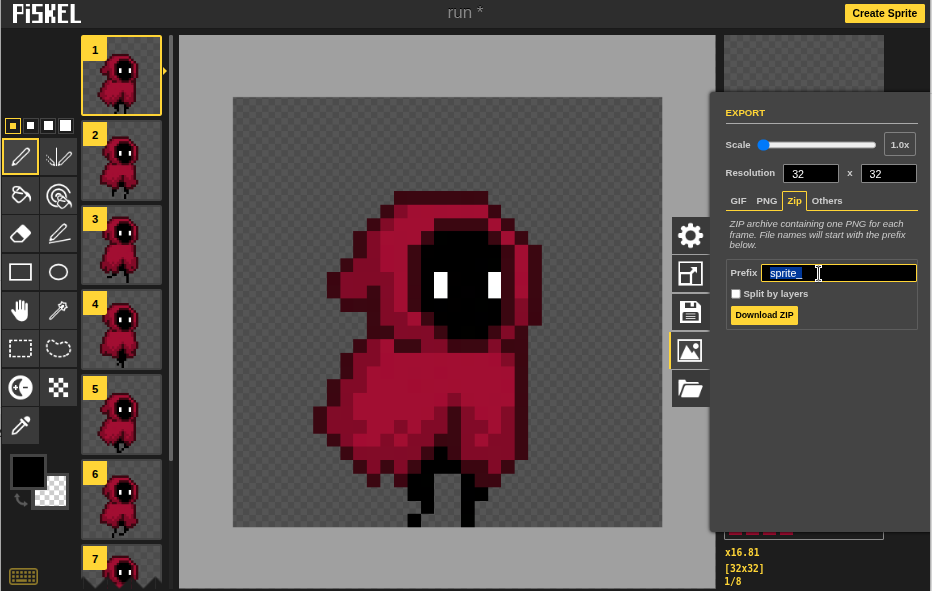
3. Remove the prefix
The exported image file names will be {prefix}0.png, {prefix}1.png, {prefix}2.png etc. We need a empty prefix (by removing the “sprite_” and leaving it empty), so the image file names will be 0.png, 1.png, 2.png etc.
4. Download the ZIP file
You will get a folder of the numbered images after unzipping.
2. Single Animation Sprite
1. Put the zipped folder to the asset folder of your game
├─ my_first_game/
    ├─ pyscratch/
    ├─ assets/
        ├─ run/
            ├─ 0.png
            ├─ 1.png
            ├─ 2.png
            ...
    ├─ my_sprite.py
    ├─ main.py
2. Specify the folder path in when creating the sprite
For example, in my_sprite.py
import pyscratch as pysc

my_sprite = pysc.create_animated_sprite("assets/run")

def animate():
    while True:
        yield 0.2
        my_sprite.next_frame()

my_sprite.when_game_start().add_handler(animate)
3. Multi-Animation Sprite
1. Export each animation from Piskel and unzip the content
2. Open a new folder for the sprite and put in the animations (i.e. the folders)
├─ my_first_game/
    ├─ pyscratch/
    ├─ assets/
        ├─ my_sprite/
            ├─ run/
                ├─ 0.png
                ├─ 1.png
                ├─ 2.png
                ...
            ├─ idle/
                ├─ 0.png
                ├─ 1.png
                ├─ 2.png
                ...
    ├─ my_sprite.py
    ├─ main.py
3. Specify the folder path in when creating the sprite
my_sprite.py
import pyscratch as pysc

my_sprite = pysc.create_animated_sprite("assets/my_sprite")

# Event: on game start: switch frame
def animate():
    my_sprite.set_animation("idle") # reference the folder name of the animation
    while True:
        yield 0.2 # wait for 0.2 second
        my_sprite.next_frame()

my_sprite.when_game_start().add_handler(animate)


# Event: on game start: movement and animations
def movement():
    while True:
        yield 1/30 # wait one frame

        if pysc.is_key_pressed("left"):
            my_sprite.set_animation("run") # reference the folder name of the animation
            my_sprite.move_indir(5)

        else:
            my_sprite.set_animation("idle")

my_sprite.when_game_start().add_handler(movement)
A Slightly Polished Example
In the demo, only the first four frames of the idle animation were used (from 0.png to 3.png). The other frames were removed.
Code
import pyscratch as pysc

my_sprite = pysc.create_animated_sprite("assets/my_sprite")


# variables for this sprite only
my_sprite['frame_interval'] = 0.4

# Event: on game start: switch frame
def animate():

    my_sprite.scale_by(5)
    my_sprite.set_animation("idle") # reference the folder name of the animation
    while True:
        yield my_sprite['frame_interval']
        my_sprite.next_frame()

my_sprite.when_game_start().add_handler(animate)


# Event: on game start: movement
def movement():

    my_sprite.set_rotation_style_left_right()
    while True:
        yield 1/30

        if pysc.is_key_pressed("d"):
            my_sprite.set_animation("run")
            my_sprite.direction = 0
            my_sprite.move_indir(5)
            my_sprite['frame_interval'] = 0.2

        elif pysc.is_key_pressed("a"):
            my_sprite.set_animation("run")
            my_sprite.direction = 180
            my_sprite.move_indir(5)
            my_sprite['frame_interval'] = 0.2

        else:
            my_sprite.set_animation("idle")
            my_sprite['frame_interval'] = 0.4

my_sprite.when_game_start().add_handler(movement)